
Treating 'Shy Headlight' Syndrome
One of the C2 Corvette's styling signatures are its concealed headlights. Hiding the headlights made it possible to have an unbroken horizontal line running around the entire car, a unique and striking design feature.
The Corvette's dual headlights are mounted in streamlined 'pods' that are driven by electric motors connected to a compact gearbox, with one motor/gearbox for each side of the car.
When I purchased the Red Rocket the headlights opened and closed as they were supposed to, and given that I never drive the car at night, they were rarely opened. To be honest, it was only during the annual inspection required for historic registration that I would tentatively push the switch to swing them open.
When the car was inspected in 2022 the headlights were a no-show. Pushing the switch up or down made no difference, they refused to show themselves. I was surprised that both headlights had stopped working at the same time, I thought maybe I had messed up the wiring when I did the engine bay restoration.
I used a multimeter to check that the motors were getting power (they were), and then guessed that they had seized due to lack of use.
My next step was to remove one of the motors and test it on the bench. The right-side motor looked to be the oldest (the one on the left is much cleaner), it looked like it has never been out of the car, so it was the first to come out.
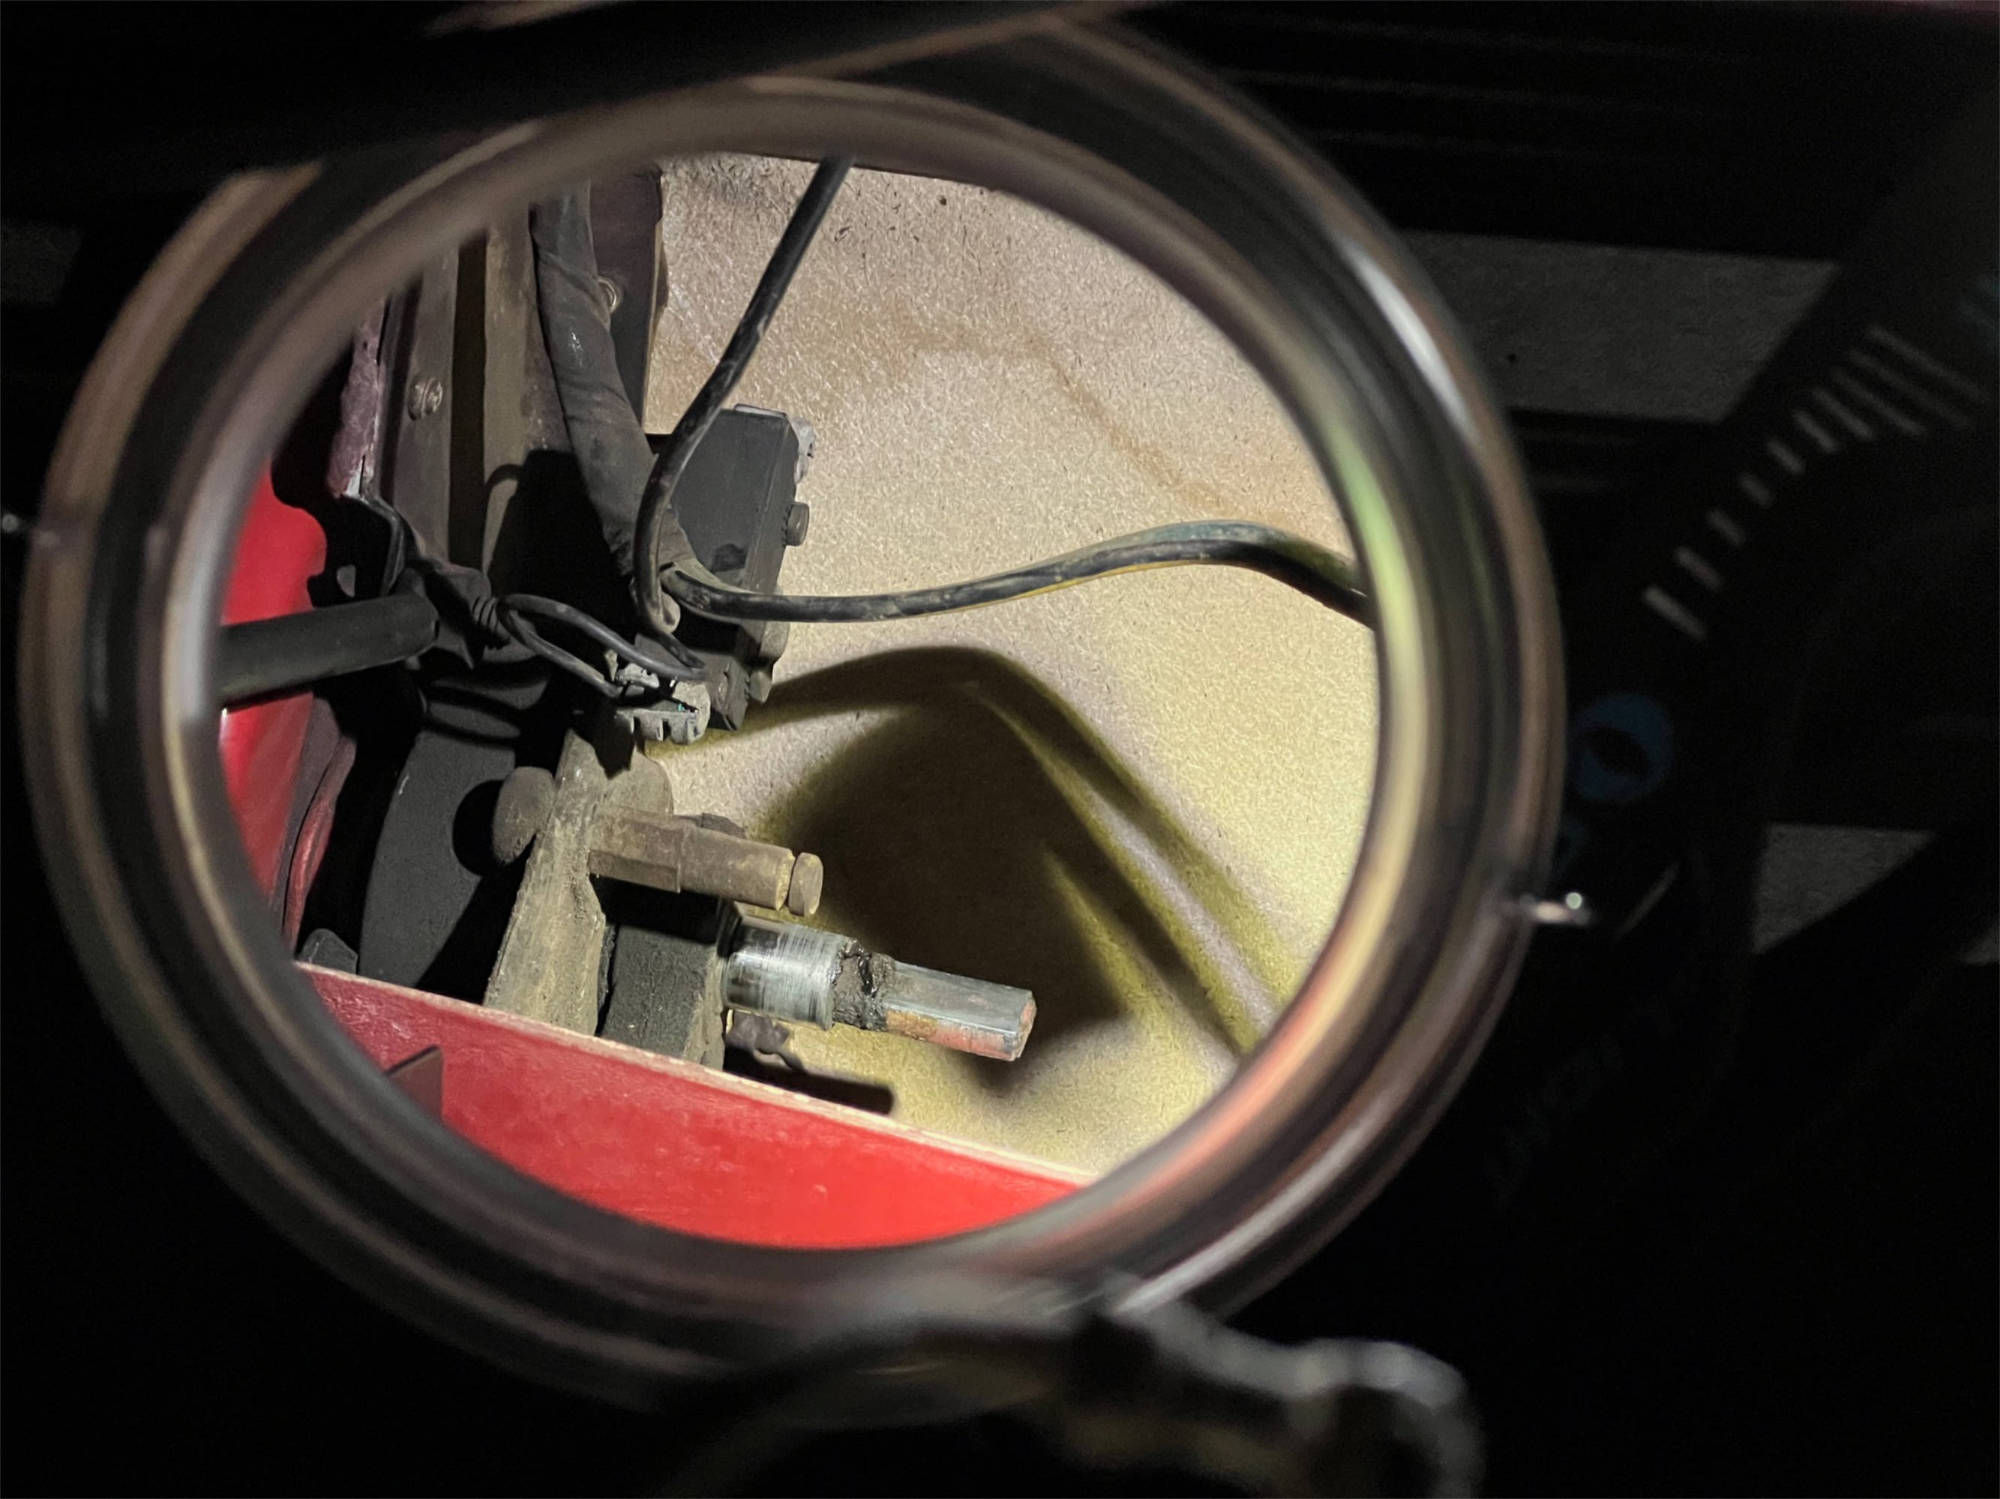
Removing the motor
There's always been an air of mystery surrounding the headlights on the C2 Corvette, the sense that they functioned by magic, and are best left alone to avoid breaking the spell that keeps them working.
With this in mind, I was expecting it to be very tricky to remove the motors, so I was pleasantly surprised to find that it's super easy. There are plenty of articles online to guide you, but the best tip I read was to place a small mirror and a light at the bottom of the radiator support so you can clearly see the motor, the wiring loom and the shaft that the motor is connected to.
Following this tip, it was easy to remove the ground wire, the wiring plug and the single clip that holds the motor in place. Then the motor simply slides off the shaft. I wrapped the motor in a towel so I could remove it via the gap between the bonnet and the body without scratching the paint. Too easy.
Diagnosing the problem
With the right-side motor out of the car, I thought I'd check again to see if the left headlight worked. Sure enough, with its partner out of the picture, the left headlight decided it was safe to come out, opening and closing smoothly and quietly.
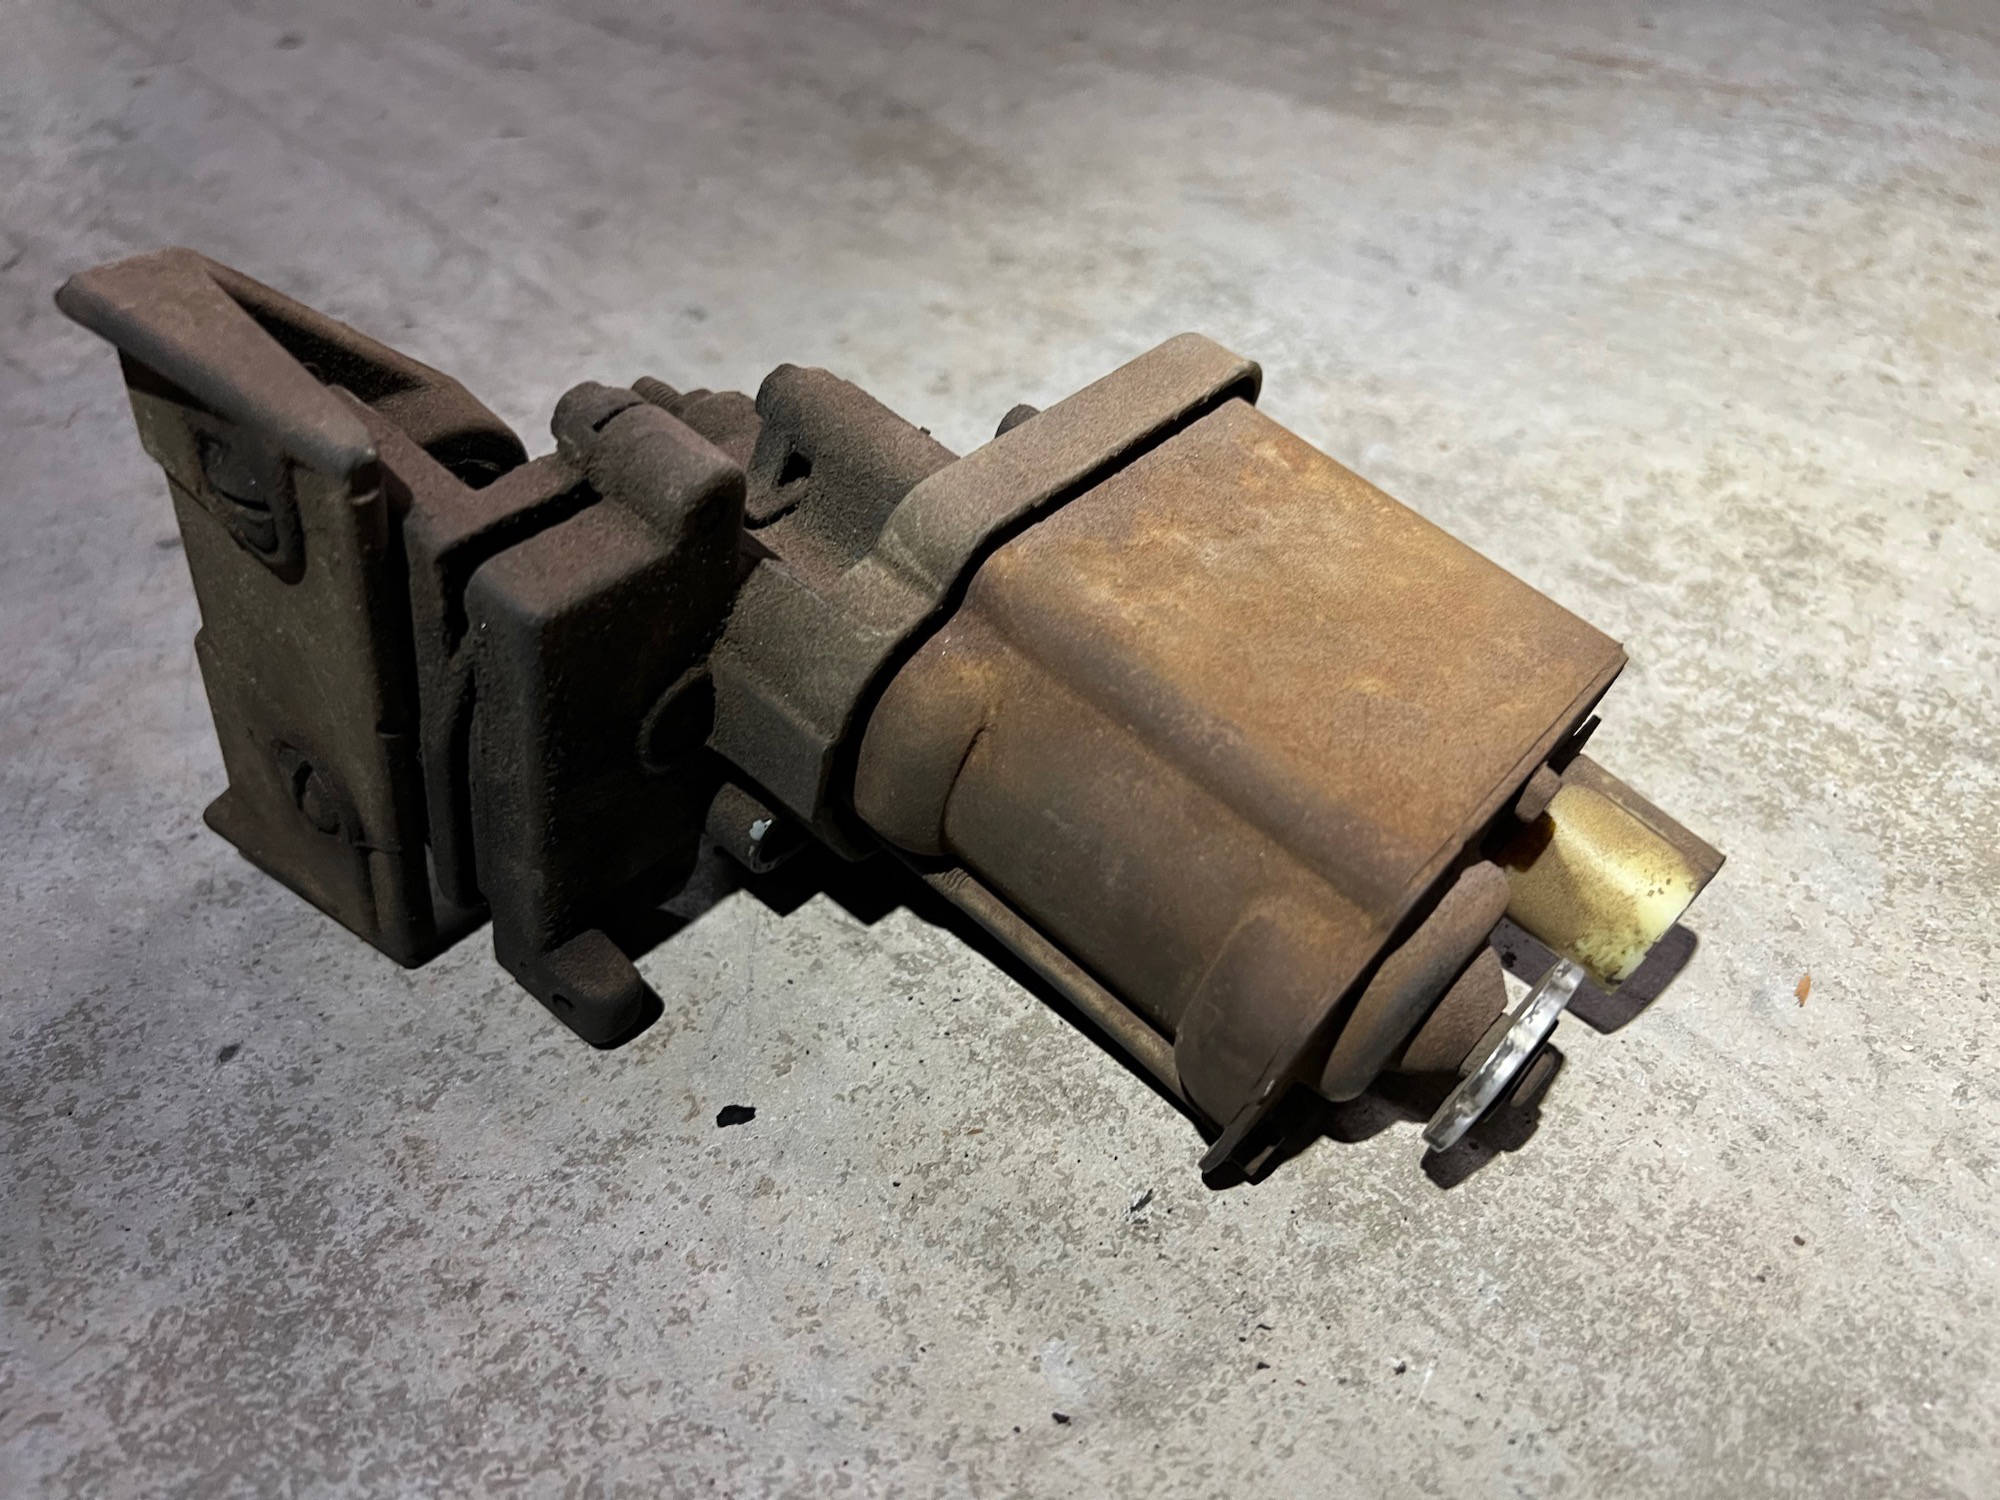
I turned my attention to the right motor. You can see from the picture below that it was very dirty, it's likely it has never been out of the car. The motor consists of 2 parts, the electric motor and the gearbox. The electric motor is connected to the gearbox with 2 long bolts, while the gearbox case is held together with 4 short bolts.
I disassembled everything, thoroughly cleaning all the aluminium parts and cleaning the rust off the electric motor. I removed the armature from the electric motor and tested it using a multimeter — it checked out as OK. There didn't seem to be any problems with the electrical side of the motor.
The gearbox side of the motor contains two gears: one nylon gear mounted on a shaft that doubles as a worm gear, and a larger gear made of pot-metal. It's the larger gear that connects to the headlight pivot shaft — this is the gear that does the heavy lifting.
It's common for this gear to become damaged, it's soft metal teeth becoming distorted and worn. The gear in my headlight motor was heavily worn — this was almost certainly the cause of the problem. The teeth were so twisted I suspect the gear had jammed, causing the electric motor to draw too much current and stop both motors from working.
Repairing the gear and reinstalling
A common fix for a damaged gear is to rotate it 180 degrees. The headlight only moves through a 180-degree arc, so half the gear is never used. By rotating the gear, the damaged teeth can be avoided and the untouched teeth used instead (this trick only works once).
This looked like a viable option, one side of my gear still looked OK. As a precaution I used a grinding wheel on the Dremel to clean up the damaged teeth as much as I could, just in case I didn't get the gear positioned perfectly when reassembling the gearbox.
These gears can be purchased new from suppliers like Zip Corvette — I plan to add 2 to my next order (I'm sure the left headlight will need repair some day). For now the repaired gear will have to do.
With the gear repaired, and all the parts cleaned, I greased everything generously and reassembled the gearbox. I cleaned the armature in the electric motor (sanding the contacts with 2000-grit), and gave the case a coat of Eastwood paint, reattached it to the gearbox and then reinstalled the motor in the car.
As expected, reinstalling the motor was trickier than removing it. Working upside-down while looking in a mirror is confusing, so it took some juggling to get the motor reconnected to the headlight pivot shaft.
With everything back in the car, it was time to flick the switch. Would it work, or was all my effort in vain? Success! Both headlights swung open in (almost) perfect sync. The right headlight is still a little slower to close, but it's working correctly. I think a new gear will probably have it working 100% as new.
I ordered a couple of headlight motor drive gears from Zip Corvette. Fitting the new gear was simple, but a good tip is to mark the position of the old gear on the casing before you remove it, this makes it a lot easier to re-fit the headlight motor to the car (as the gear will engage with the pivot shaft when the headlight is in the closed position).
With the new gear fitted the headlight is now working 100% correctly, both headlights open and close in perfect sync.

A couple of years later and I realise the headlight buckets are now opening but not closing. I'm sure the motors are OK, so I suspect the headlight bucket roll switch is faulty.
I replace the fuse as a precaution, the headlight bucket motors use an auto-resetting circuit breaker that automatically disconnects the circuit if an overload is detected, and then automatically resets itself.
In the end I replaced the switch with a reproduction from Zip Corvette – problem solved.


The images above show the right headlight motor after restoration. All the aluminium was cleaned and polished, and the metal body of the motor repainted using Eastwood Clear Zinc. Note the '1 65' date code stamped on the body indicating January 1965 production.
The images above show the right headlight motor after restoration. All the aluminium was cleaned and polished, and the metal body of the motor repainted using Eastwood Clear Zinc. Note the '1 65' date code stamped on the body indicating January 1965 production.
