Delco Alternator Rebuild & Restoration

The Delco Remy 10DN alternator was first used in the 1963 Corvette. It was the first alternator used by GM, replacing the old DC generators. It used an external regulator (mounted on the inner guard close to the core support) and produced a modest 37 amps.
This project started out as a cleaning job. With the car parked indefinitely due to Covid restrictions in 2020, I'd started removing parts from the car and bringing them home to clean and/or repaint.
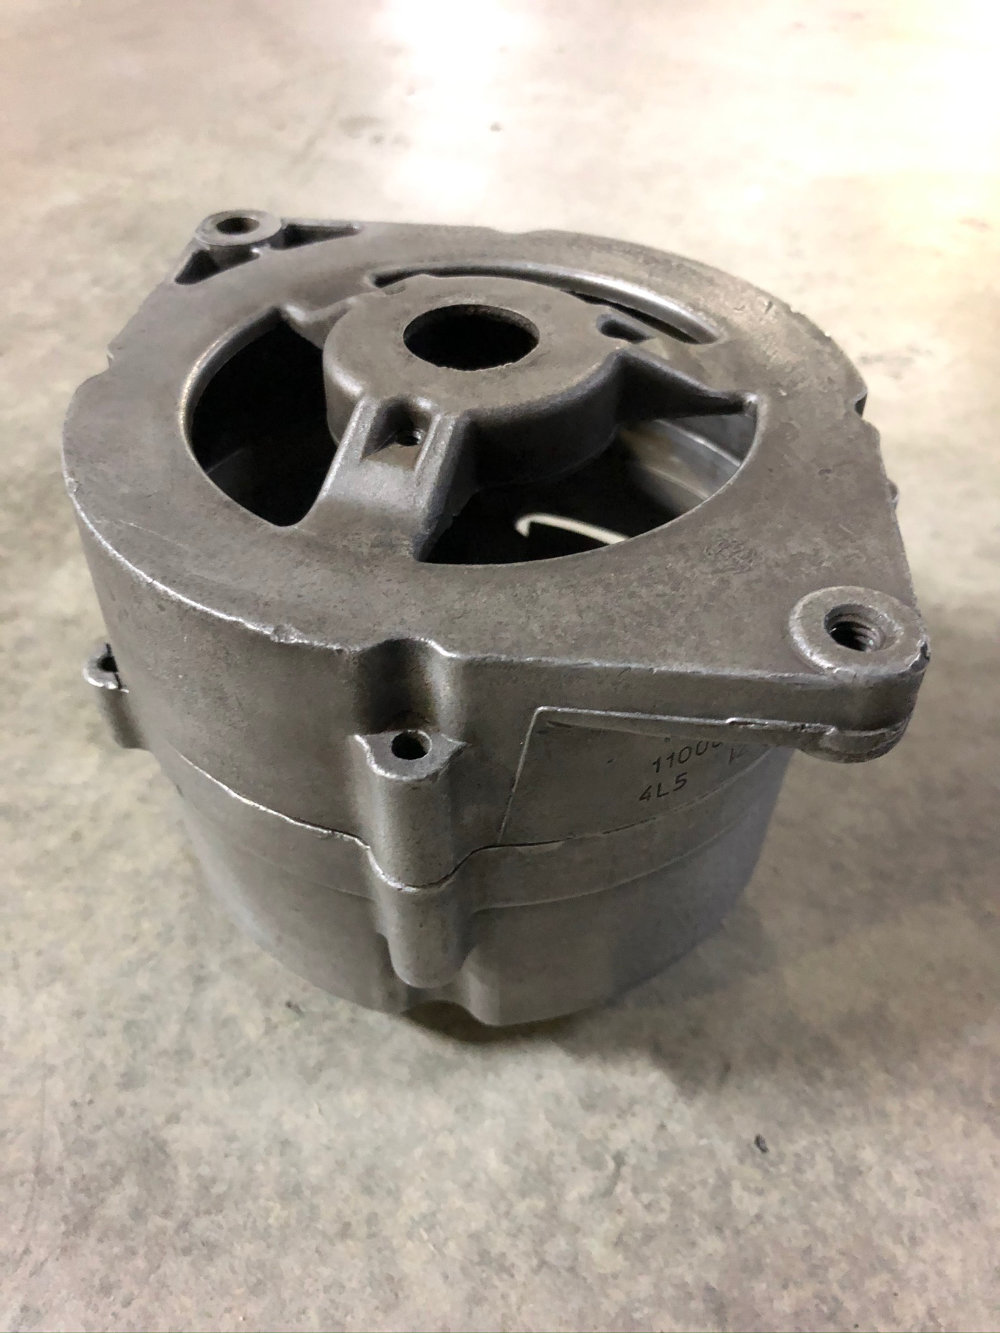
With the valve covers looking great now, the alternator was the ugly duckling under the hood. Removing it was a simple job, so I brought it home and started trying to clean up the aluminium case. I purchased a good quality metal polish and got to work, but the results were not very encouraging.
I quickly decided to pull the alternator apart and send the case out for vapour blasting. Vapour blasting is going to give me the best result possible, and hopefully help to keep the case clean for longer.
Why is nothing easy with old cars?
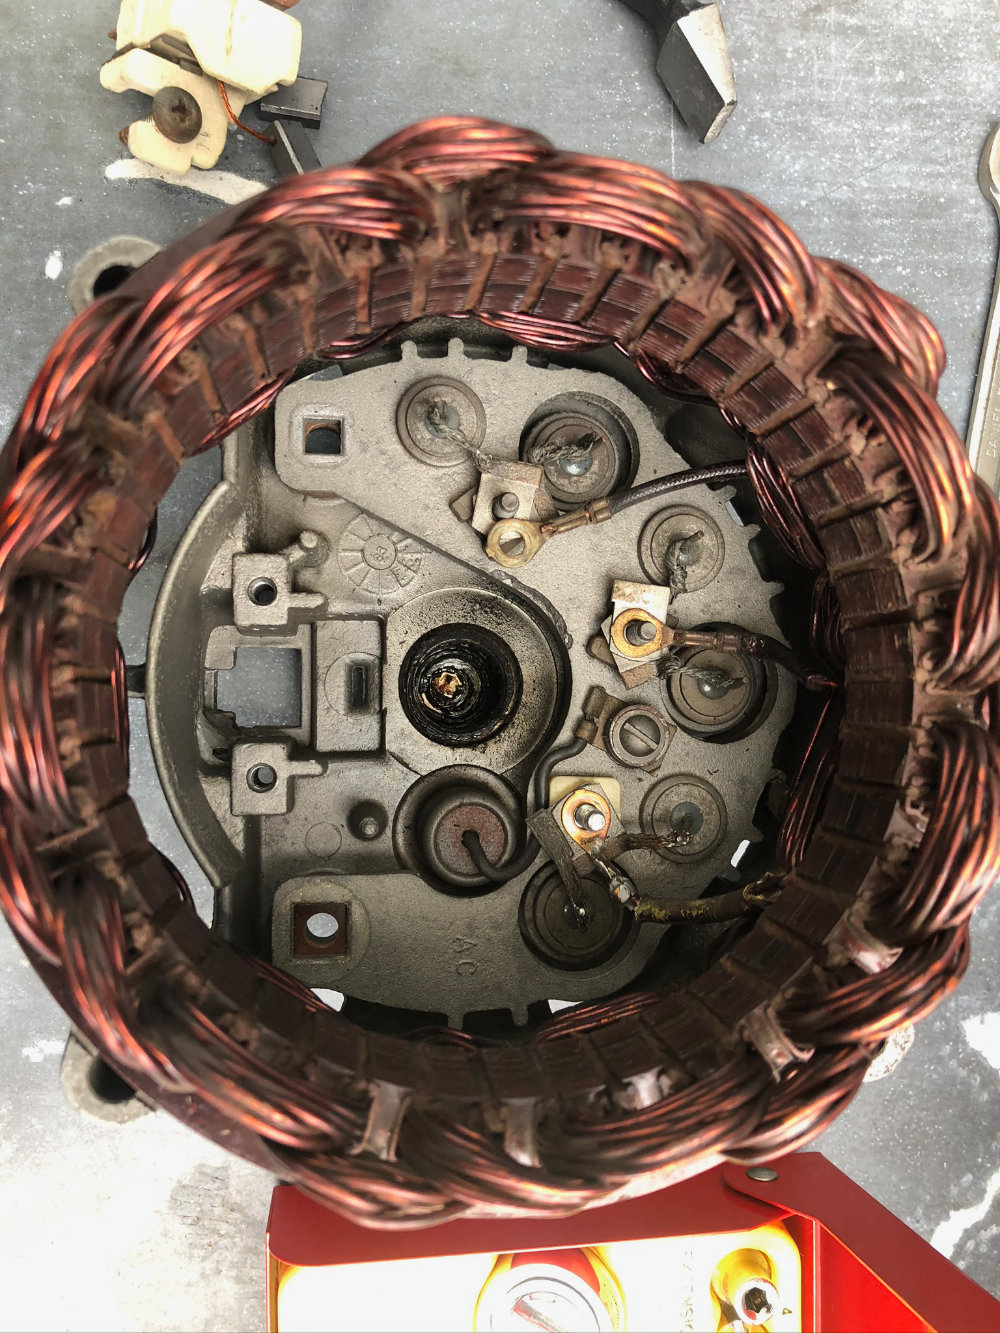
After consulting some Youtube videos, I got to work disassembling the alternator. Have you noticed how easily everything comes apart on Youtube? "Remove the nut that holds the pulley on and the armature will slide out of the case effortlessly"…except when it doesn't.
In my case the front bearing was welded to the armature shaft, and the bearing is held in place by a plate that bolts on from the inside! The bearing had quite a lot of play in it, so it had probably been getting very hot, effectively welding itself to the shaft. The only way to get it out was to loosen the plate holding the bearing in place, which meant somehow getting to the bolts that were hidden on the inside of the alternator case.
This was achieved by taking a small ring spanner, filing it down to make it thin enough to get on to the bolt and then beating it with a hammer to make it banana shaped so it could be feed under the case on to the hidden bolt. Then, with what seemed like a 1000 minute turns, the bolts were edged out and, miraculously, the bearing came away from the case.
The bearing was still welded to the shaft, but the Dremel with a cut-off wheel made light work of that, so I finally have the front of the alternator apart. The remainder of the disassembly was a piece of cake compared to this.
Completing the rebuild
Rebuild kits for these early alternators are impossible to find in Australia, however they are available on eBay from the USA. The kit I purchased included all the bearings, diodes, brushes and hardware (screws, posts etc...) required to rebuild the alternator using the existing case, stator, armature, fan and pulley.
I cleaned the armature and stator with circuit board cleaner, and repainted the section of the stator that can be seen from the outside (where the case joins). The pulley was polished up with Scotch Brite and metal polish, and the fan was stripped to bare metal and repainted with Eastwood Clear Zinc finish.
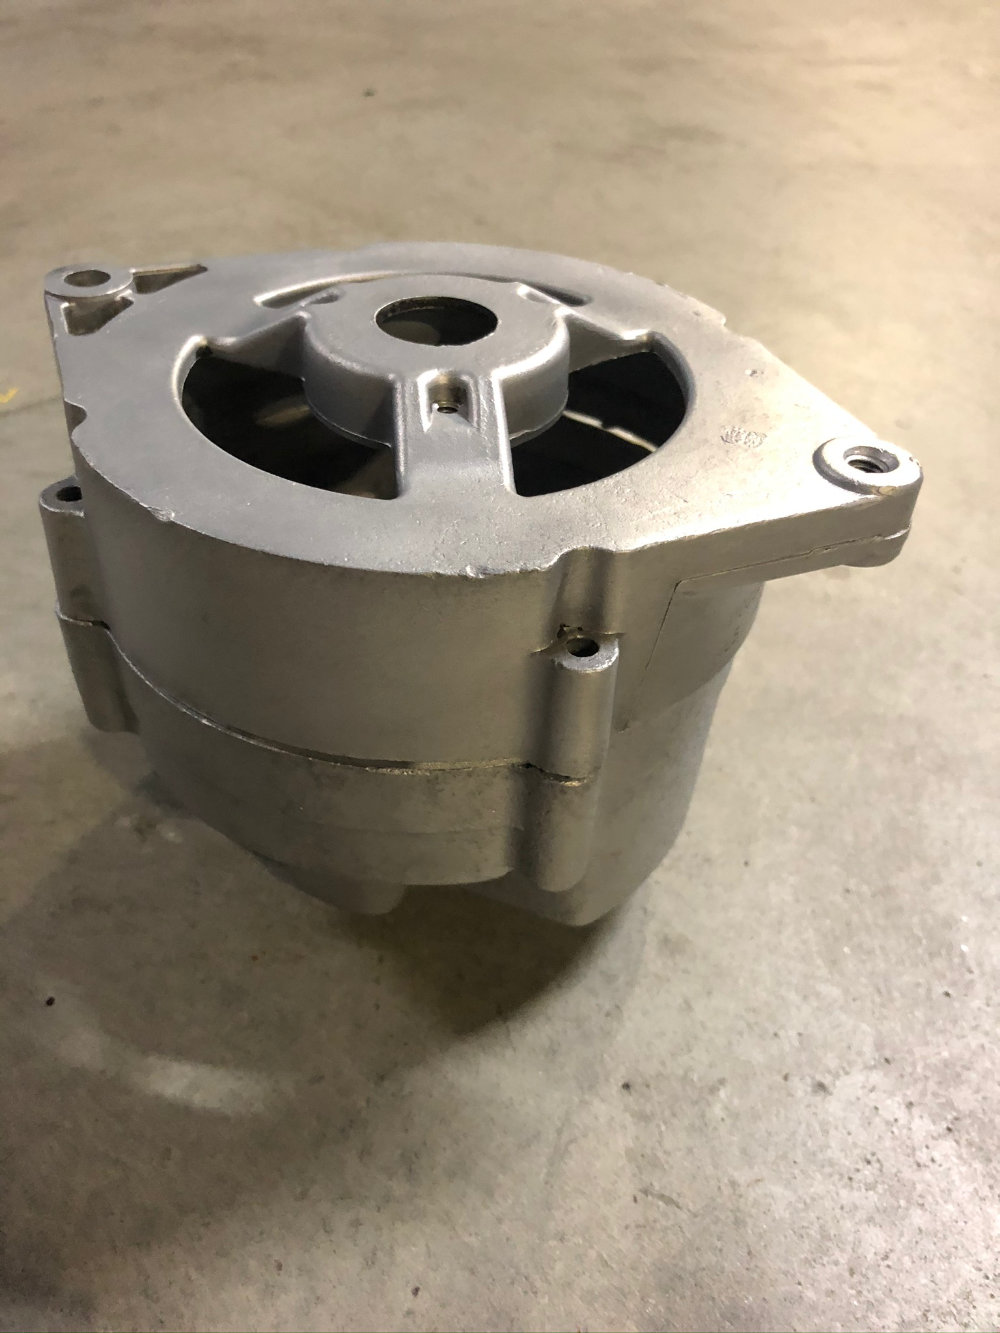
The case came back from vapour blasting looking as good as possible, you can see from the pictures below it's much cleaner and shinier. The stamped date code is also much clearer now. It was now just a matter of putting everything back together.
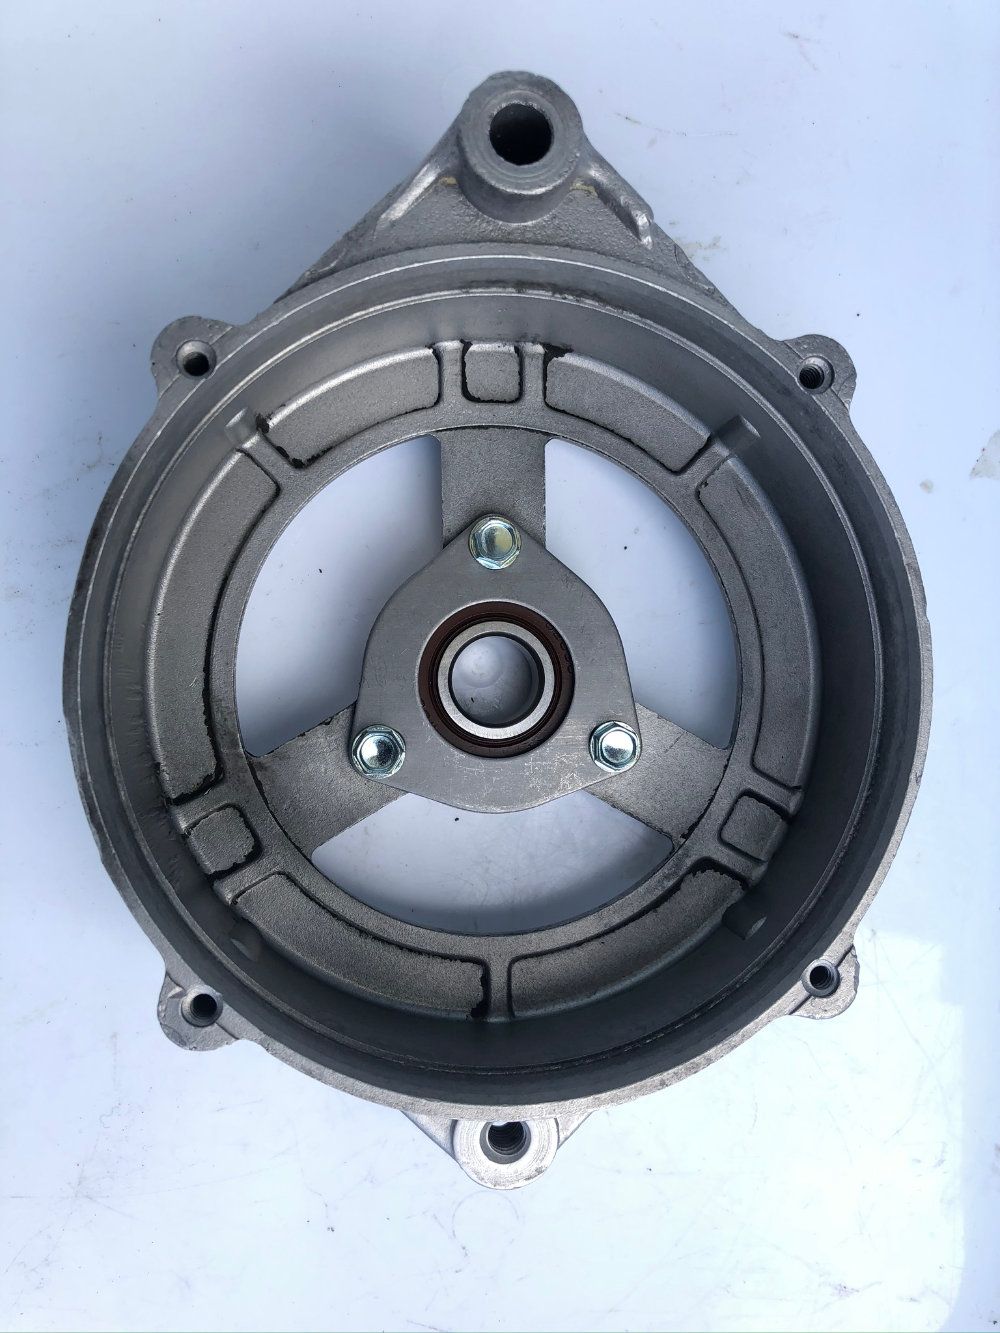
Installing the front bearing went very smoothly — just like a Youtube video. I put the case in the oven for 15 minutes to heat it up, and the bearing was kept in the freezer overnight to shrink it a little. When I placed the bearing on the case it just dropped in to place, perfectly seated. Once back at room temperature it was locked in place. The rear bearing was a bit more of a challenge, it's much longer and really requires a press to remove and install. I recommend asking your friendly neighbourhood mechanic to help you with this.
Installation and testing
Testing the alternator before you put it back in the car is highly recommended. I know this because I didn't, and I lived to regret it. A cheap multi-meter is all you need to test for continuity across the positive and negative posts. If correctly assembled, the alternator will have continuity in one direction only, if you have continuity in both directions then you have a short-circuit — you've done something wrong. I reinstalled the alternator without performing this simple test, so when I connected the battery the wiring between the battery and the alternator started to smoke!
Removing the alternator and disassembling it (I'm getting good at it now) showed a simple error, when connecting the wire from the internal capacitor, had created the short. With this fixed, and everything back together, the alternator was reinstalled and now looks like new, and works like new too.
I repainted the mounting brackets using satin-black engine enamel and fitted a new adjustment bolt as the finishing touch.
It's funny how a simple cleaning job turned in to quite a big project, but now everything under the bonnet looks good, so it was worth the effort.
When disassembling anything on the car, make sure you take lots of photos (or even a video). You might not get around to reassembling the parts for days (or months!), so take it from me, you'll forget where things went, or which washer went on first. Having reference photos can be a life saver, and they come in handy if you're crazy enough to build a website documenting your projects.
When I shorted out the alternator, it wasn't the first time the engine loom had been cooked. With the engine out of the car, I removed the engine loom and found a lot of melted and cracked insulation. I purchased and installed a brand new Lectric loom from the USA, so engine loom is now as good as new.